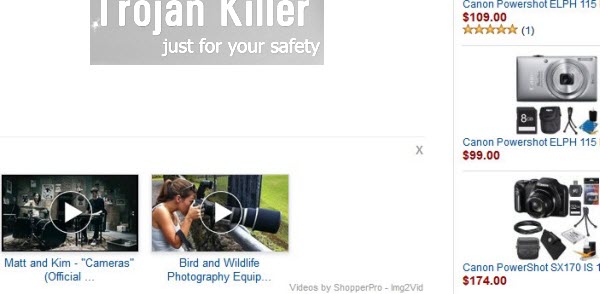
Shopper Pro ads may appear in your browser when visiting some of your favourite websites. In particular this occurs if you to go Walmart, Amazon, Ebay, Bestbuy, or any other commercial website. These ads and Videos by Shopper Pro mean that your browser became infected with the adware program bearing such a name. So, when you want to buy something online, you will see the set of videos titled as Videos by Shopper Pro – Img2Vid, together with the item of your concern. Plus, you might also encounter a lot of other unusual things taking place with your browser, such as persistent redirects, pop-ups, etc.
The persistent occurrence of all such Shopper Pro ads is the headache for many users today. They try to uninstall them from browsers, but don’t know how exactly to do it. All attempts to remove the adware regularly turns out to be vain. The ads still pop up. Furthermore, if you disable the extension or add-on in your browser, which is related to Shopper Pro, you might still see these ads everywhere in your browser.
Shopper Pro adware is most commonly distributed together with many other free programs downloaded by users at various freeware download resources. You might notice this fact, but typically all free applications clearly specify what other programs are offered for you to download as a part of the bundle software installation offer. It is your duty to notice this fact and not to allow any hidden installations to take place on your computer.
In this guide below we will explain the steps you need to make to get rid of Shopper Pro ads. So, please try to be as careful as you can when adhering to these uninstall instructions we’ve prepared for you. If you need any subsequent help on our part, please let us know.
Anti-malware tool necessary for Shopper Pro adware removal
Similar adware removal video:
Shopper Pro adware detailed removal instructions
Step 1. Uninstalling Shopper Pro adware from the Control Panel of your computer.
Instructions for Windows XP, Vista and 7 operating systems:
- Make sure that all your browsers infected with adware are shut down (closed).
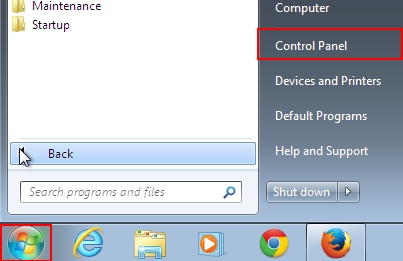
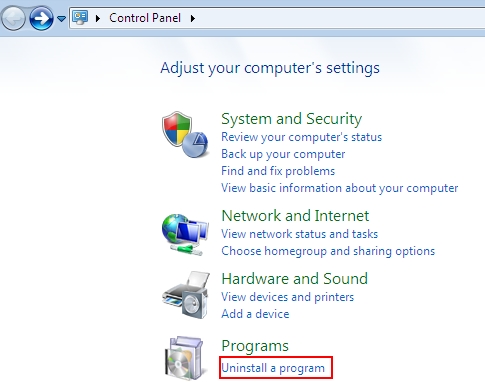
- Click “Start” and go to the “Control Panel“:
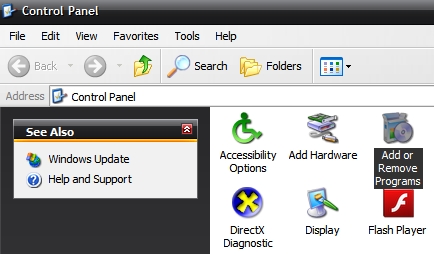
- In Windows XP click “Add or remove programs“:
- In Windows Vista and 7 click “Uninstall a program“:
- Uninstall Shopper Pro adware. To do it, in Windows XP click “Remove” button related to it. In Windows Vista and 7 right-click this adware program with the PC mouse and click “Uninstall / Change“.
Instructions for Windows 8 operating system:
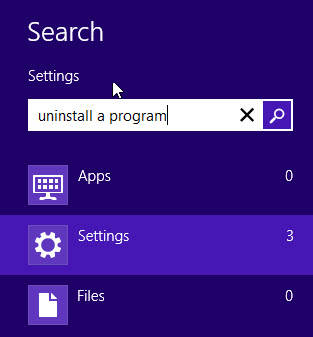
- Move the PC mouse towards the top right hot corner of Windows 8 screen, click “Search“:
- Type “Uninstall a program“, then click “Settings“:
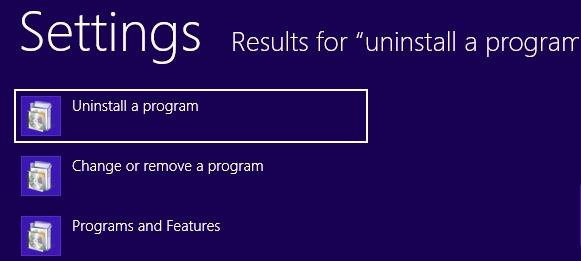
- In the left menu that has come up select “Uninstall a program“:
- Uninstall Shopper Pro adware program. To do it, in Windows 8 right-click such adware program with the PC mouse and click “Uninstall / Change“.

Step 2. Removing adware from the list of add-ons and extensions of your browser.
In addition to removal of adware from the Control Panel of your PC as explained above, you also need to remove this adware from the add-ons or extensions of your browser. Please follow this guide for managing browser add-ons and extensions for more detailed information. Remove any items related to this particular adware and other unwanted applications installed on your PC.
Step 3. Scanning your computer with reliable and effective security software for removal of all adware remnants.
- Download Plumbytes Anti-Malware through the download button above.
- Install the program and scan your computer with it.
- At the end of scan click “Apply” to remove all infections associated with this adware.
- Important! It is also necessary that you reset your browsers with Plumbytes Anti-Malware after this particular adware removal. Shut down all your available browsers now.
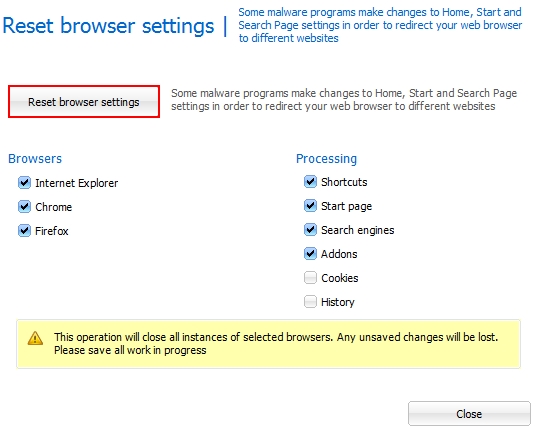
- In Plumbytes Anti-Malware click “Tools” tab and select “Reset browser settings“:
- Select which particular browsers you want to be reset and choose the reset options:
- Click “Reset browser settings” button.
- You will receive the confirmation windows about browser settings reset successfully.
- Reboot your PC now.

